A recurve bow is considered the best hunting archery weapon. If you love shooting and have this equipment in your arsenal, it is evident that you are having a great time using it.
To make your shooting experience even more enjoyable and comfortable than usual, you can use an arrow rest on your recurve bow. Though it is not mandatory, you can still use it to improve your shooting accuracy without any hassle.
So, how to install arrow rest on recurve bow? You will be happy to know that we have got the answer for you. Keep reading as we will reveal the mystery in the upcoming section.
The Way to Install Arrow Rest on Recurve Bow
Here, we have included a step-by-step procedure that you can follow to successfully complete the arrow rest installation.

With a Stick-on Arrow Rest:
Fortunately, the process to get this job done is not challenging. Check it out.
Step 1: Clean the Table
Before you dive into the project, you should clean the workstation. Look for grime and dust and clean them properly. If there are unnecessary tools present on the table, remove them immediately.
Next, clean the arrow risers’ surface carefully. Check for the presence of grease on that area, and then remove it. You can use dishwashing liquid for this purpose. Make sure you do this whole process slowly, or else you will be in jeopardy.
Step 2: Cut the Arrow Rest
If your arrow rest is oversized, you have to cut it. The best approach you can take is to put it on the riser. You should do it in a way as if you have glued it.
Then, draw the riser around. After you have done that, gently cut the arrow rest according to your desired size.
Step 3: Peel-off the Self-adhesive Paper
If your arrow rest is self-adhesive, simply peel off the strips’ end. Moreover, if you are interested in gluing an arrow plate, you can easily do that with the help of glue.
Apply it on the plates’ bottom and riser so that they can properly stick with each other.
Step 4: Align the Arrow Plate with the Bow’s Handle
This step is important, and you should do it with patience. Align the arrow plate with the bow’s handle. Leave 5/8-inches of space between the bottom portion of the bow’s sight window and arrow.
Step 5: Finish It Off
Finish it off by attaching the arrow rest on the bow. You can do it by gently pressing the rest for a couple of seconds so that it is properly attached to the bow.
Congrats! You are done with the task.

With a Screw-in Arrow Rest:
This type is currently in high demand among shooters because there is no chance that the arrow rest will fall off from the bow.
Installing it is not tough if you have proper tools and techniques. Read on to find out more.
Step 1: Clean Your Workspace
If you are using your workspace after a long time, there is a possibility that dirt and grime will accumulate everywhere.
So, remove the dust, and if there are tools on the table which you find unnecessary for this project, put them in other spots.
Step 2: Understand the Purpose of the Holes
If you look from the front, you will notice that there are two holes. The first one is for the arrow rest, and the second for a plunger.
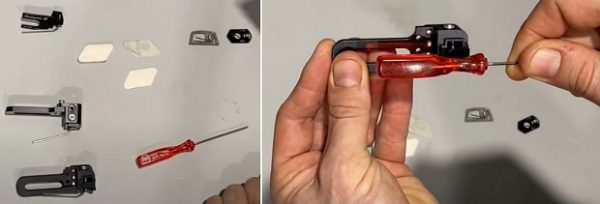
Step 3: Screw in the Arrow-rest
Gently bolt the screws through the bow’s riser holes. Do it slowly and make sure it is tight when you are done with it.

Step 4: Check for Any Adjustments
Just like the stick-on arrow rest, you should leave exactly 5/8-inches of space between the bottom portion of the bow’s sight window and arrow.
Finally, check for any other adjustments. The mandatory thing you should check is the riser bolt. According to your comfort, you should either loosen or tighten it.
Congrats! The recurve bow arrow rest installation task is finished.
Tips for Your Out During Shooting
Below are some of the tips that can help you out during your shooting time.
Tip 1: Ensure the Bowstring Is Properly Lined Up
Take a bow square and place it on your installed arrow rest. In this way, you will be able to line up the bowstring. Next, you should mark exactly 5mm above the stated square.
This marked area is the spot where the nocking point will be situated. To make sure you have done everything properly, check whether the arrow is resting comfortably or not. If it is, you are good to go, and if not, you have to find out the flaw.
Tip 2: Start Shooting to Test the Condition of the Arrow Rest
You can check its condition by shooting some arrows. If the arrow goes too high, this means that the nocking point is excessively low on the bowstring. In this case, you have to adjust it in an upward direction.
On the other hand, if the arrow goes too low, the nocking point is excessively high on the bowstring. So, adjust it in a downward direction, and you will be all set.
Keep in mind that you only have to adjust the nocking point if this type of problem occurs. Avoid adjusting the arrow rest because this is going to create a new issue.
Tip 3: Go to an Archery Shop to Install the Arrow Rest
Yes, you can visit an archery shop in your area and take their help to install the arrow rest on your recurve bow. This approach is not necessary, but if you are not confident enough to do the installation by yourself, you can take their help without thinking twice.
They are only going to charge a small fee, and the best thing is your bow will be in safe hands.
Conclusion
Hope you now know How to install arrow rest on recurve bow from this article.
Don’t forget to share it with your loved ones. Have a good day.
